When it comes to maintaining your RV, many jobs demand appropriately qualified technicians, especially so when your vehicle is under warranty. But when the warranty expires, if you have a tool set and a bit of mechanical know-how, you can save time and money by performing some of the maintenance yourself.
Most privately owned motorhomes clock up reasonably low annual kilometres. For example, new Fiat Ducato service intervals are currently set at every 30,000km, which is many years motoring for most.
However, motorhomes consistently carry more weight than trade vehicles, many of them operating to the limit of their GVW (Gross Vehicle Weight) most of the time. They work hard, so checks twice a year - say spring and autumn - are advised to keep them in top condition. Changing filters, engine fluids, and light bulbs are tasks to consider doing yourself.
Made from paper elements, air filters usually come in a round or rectangular box secured by spring clips, mounted on top of or beside the engine. Whatever the shape, they filter out dust and debris, so the engine breathes clean air. Gradually, they block and affect engine efficiency. They come in two styles, cleanable or disposable. Either way, when they are dirty and/or discoloured, they need either replacing or cleaning.
Fuel filters
Diesel holds water in suspension, the filter in the fuel line strains it out. It falls to the bottom of the vertically mounted filter to be removed through a draining tap. Do this regularly and change the filter at two-year intervals. Sometimes, replacement fuel filters leak because they don’t seal properly. The remedy? Replace the housing at the same time. Suitable ‘aftermarket’ housings can cost less and work just as well as original equipment.
Pollen filters
Designed to reduce cab pollen levels, these are often located near the scuttle vent at the base of the windscreen. If you are prone to hay fever, it is worth replacing them. Later-model Ducatos have them located behind the dashboard centre console, secured with screws and clips.

Engine oil
Oil companies make engine oils to various specifications. Auto-manufacturers nominate oil blends for each of their models. They put its specification in the owner’s manual. If your oil choice has the correct viscosity and specification number on the package, it is the correct oil. Be sure to buy the right amount. Same motor/ different horsepower output often means larger oil volume. So check.
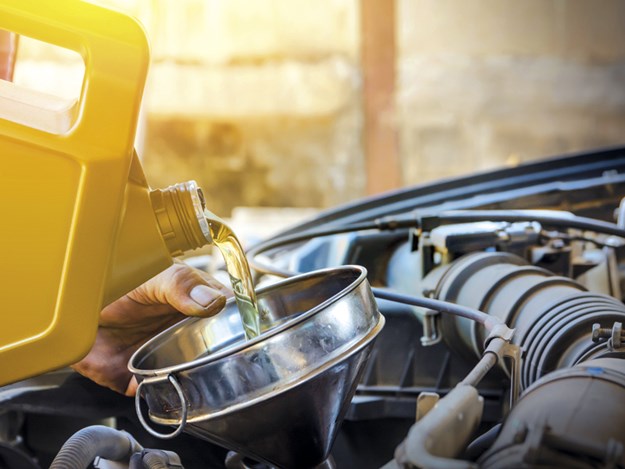
Changing oil
Be sure the drain pan is large enough to accept all the drained oil before starting. Warm the motor; oil flows best when warm. Next, remove the sump plug to release the oil into the drain pan. It will be hot, so take care and wear gloves. Remove the filter while the oil drains.
There are two common filter types; a canister that screws onto an engine outlet or a replaceable cartridge housed in a plastic/metal compartment. Check first because a special spanner may be needed to get into this compartment. Before refitting the filter, put some oil in the cartridge and rub a little on the rubber seal.
Replace the sump plug before refilling the sump, using the dipstick as a guide to refill it. Put the motor on idle to fill the filter and the engine nooks and crannies before topping up the sump again. Lastly, put the used oil in the now-empty new-oil container and take the oil and the old filter to a refuse station.
Engine coolant
AKA antifreeze comes in various grades and, like engine oil, each has its own specification. When buying replacement coolant get the one specified in the owner’s manual. Coolants are colour-coded to help ensure you choose the right one. If the replacement coolant is concentrated, it will need diluting, so follow the instructions carefully. Use distilled water, not tap water.
Brake fluid
Minor-level top-ups of the brake-fluid reservoir using the specified grade of fluid is easily done. Fill up to the mark, not over it. For brake-fluid replacement and power-steering fluid issues, it is best to take your vehicle to a service centre that has the right equipment for the task.
Find motorhomes for sale in NZ
Most privately owned motorhomes clock up reasonably low annual kilometres. For example, new Fiat Ducato service intervals are currently set at every 30,000km, which is many years motoring for most.
However, motorhomes consistently carry more weight than trade vehicles, many of them operating to the limit of their GVW (Gross Vehicle Weight) most of the time. They work hard, so checks twice a year - say spring and autumn - are advised to keep them in top condition. Changing filters, engine fluids, and light bulbs are tasks to consider doing yourself.
Filters
Air filtersMade from paper elements, air filters usually come in a round or rectangular box secured by spring clips, mounted on top of or beside the engine. Whatever the shape, they filter out dust and debris, so the engine breathes clean air. Gradually, they block and affect engine efficiency. They come in two styles, cleanable or disposable. Either way, when they are dirty and/or discoloured, they need either replacing or cleaning.
Fuel filters
Diesel holds water in suspension, the filter in the fuel line strains it out. It falls to the bottom of the vertically mounted filter to be removed through a draining tap. Do this regularly and change the filter at two-year intervals. Sometimes, replacement fuel filters leak because they don’t seal properly. The remedy? Replace the housing at the same time. Suitable ‘aftermarket’ housings can cost less and work just as well as original equipment.
Pollen filters
Designed to reduce cab pollen levels, these are often located near the scuttle vent at the base of the windscreen. If you are prone to hay fever, it is worth replacing them. Later-model Ducatos have them located behind the dashboard centre console, secured with screws and clips.
Fluids
Engine oil
Oil companies make engine oils to various specifications. Auto-manufacturers nominate oil blends for each of their models. They put its specification in the owner’s manual. If your oil choice has the correct viscosity and specification number on the package, it is the correct oil. Be sure to buy the right amount. Same motor/ different horsepower output often means larger oil volume. So check.
Changing oil
Be sure the drain pan is large enough to accept all the drained oil before starting. Warm the motor; oil flows best when warm. Next, remove the sump plug to release the oil into the drain pan. It will be hot, so take care and wear gloves. Remove the filter while the oil drains.
There are two common filter types; a canister that screws onto an engine outlet or a replaceable cartridge housed in a plastic/metal compartment. Check first because a special spanner may be needed to get into this compartment. Before refitting the filter, put some oil in the cartridge and rub a little on the rubber seal.
Replace the sump plug before refilling the sump, using the dipstick as a guide to refill it. Put the motor on idle to fill the filter and the engine nooks and crannies before topping up the sump again. Lastly, put the used oil in the now-empty new-oil container and take the oil and the old filter to a refuse station.
Engine coolant
AKA antifreeze comes in various grades and, like engine oil, each has its own specification. When buying replacement coolant get the one specified in the owner’s manual. Coolants are colour-coded to help ensure you choose the right one. If the replacement coolant is concentrated, it will need diluting, so follow the instructions carefully. Use distilled water, not tap water.
Brake fluid
Minor-level top-ups of the brake-fluid reservoir using the specified grade of fluid is easily done. Fill up to the mark, not over it. For brake-fluid replacement and power-steering fluid issues, it is best to take your vehicle to a service centre that has the right equipment for the task.
Bulbs
The headlight bulbs on most late-model motorhomes can be replaced without removing the headlights. Partial disassembly of tail-light housing may be needed to remove/replace bulbs. To avoid disconnecting wiring, try fastening the tail-light assembly to the bodywork with masking tape while working on it.Search online
YouTube and Google are useful resources to help get you started. Videos providing instructions on basic servicing tasks are relatively easy to find. Just be sure to search for the specific brand, model and year of the vehicle on which you are working.Find motorhomes for sale in NZ